【初心者向け】UIAlertControllerでアラートを表示する方法
Table of Contents
iOSでは紆余曲折あった後に、Alert(アラート)とActionSheet(アクションシート)を一つのクラスに集約されました。 またUIViewベースだったものがUIViewControllerに変わったことで表示挙動も変わりました。
しかし特に難しくなってはおらず、通常の利用ケースであれば簡単に使うことが出来ます。
Alert(アラート)とActionSheet(アクションシート)の違い
ユーザー行動かそうじゃないかになります。
通信結果によって起きたエラーをcancel or retryを選ばせるのはAlert(アラート)です。
選んだセルに対する送信するのか編集するのかゴミ箱にすてるのかといったアクションを選ぶのはActionSheet(アクションシート)です。
1ボタン: もっともポピュラーな利用ケース
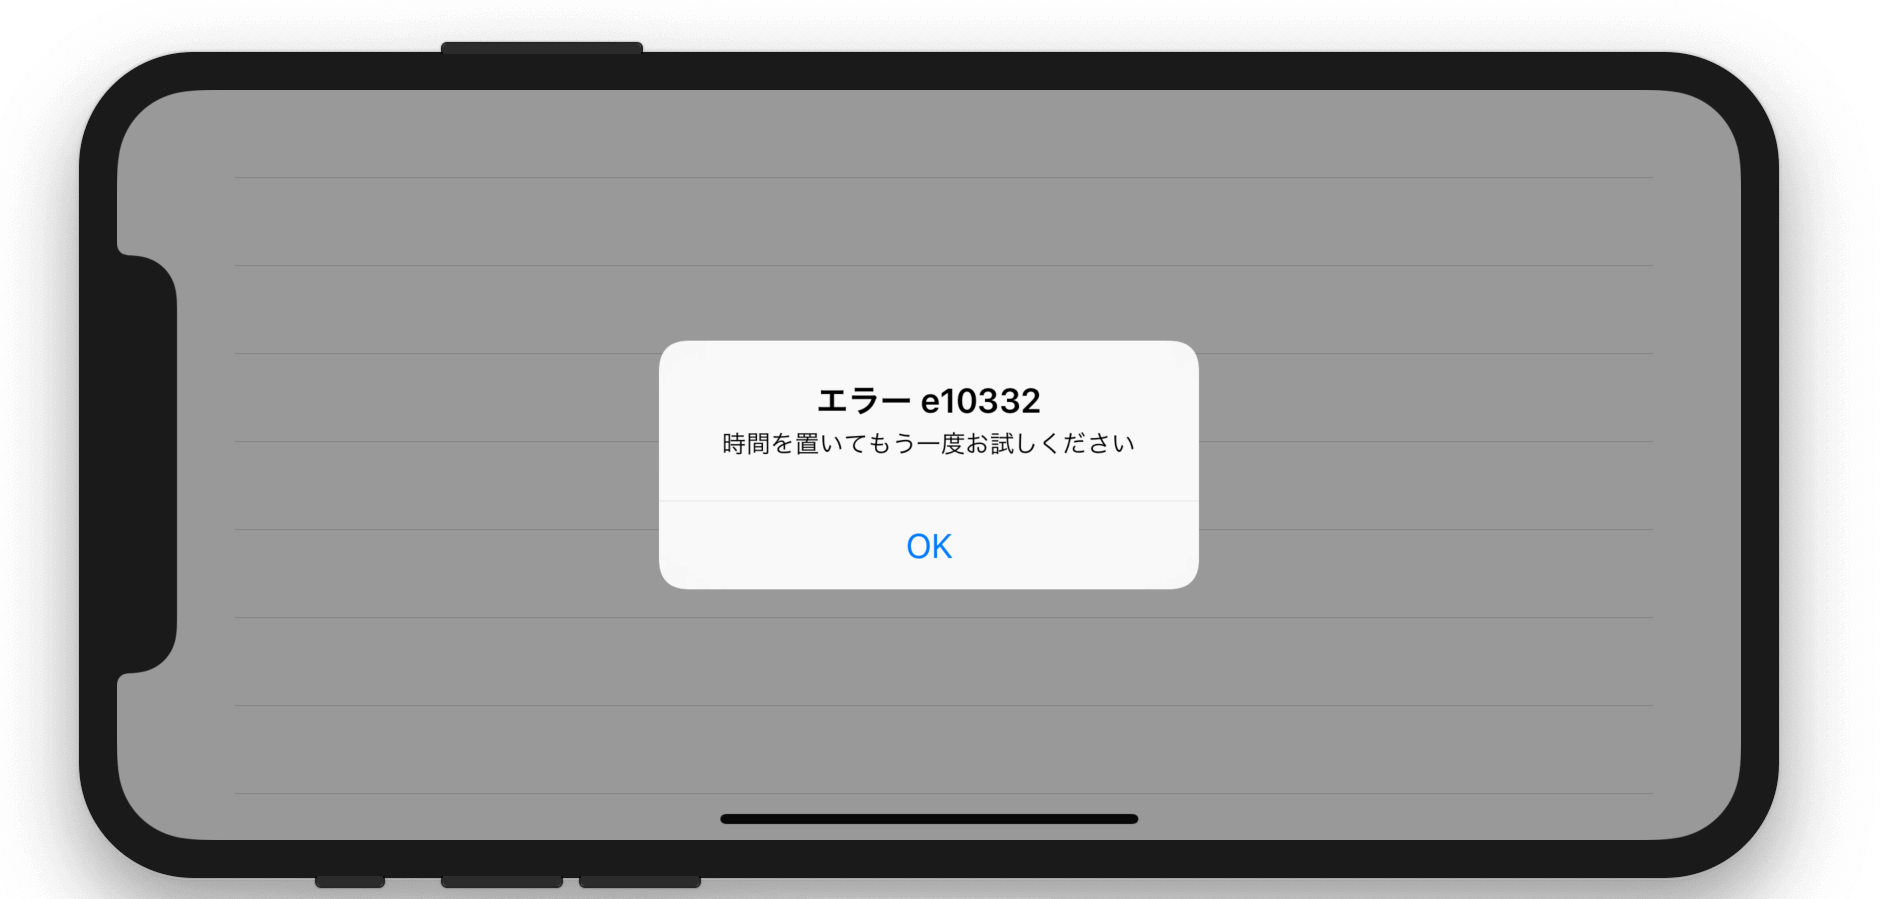
let alert = UIAlertController(title: "エラー e10332",
                              message: "時間を置いてもう一度お試しください",
                              preferredStyle: UIAlertController.Style.alert)
alert.addAction(UIAlertAction(title: "OK", style: .default, handler: nil))
present(alert, animated: true, completion: nil)
Alert(アラート)とActionSheet(アクションシート)はStyle指定
UIAlertController.Style を渡すことでどちらにするか制御できます。
2ボタン: Yes or No の二択
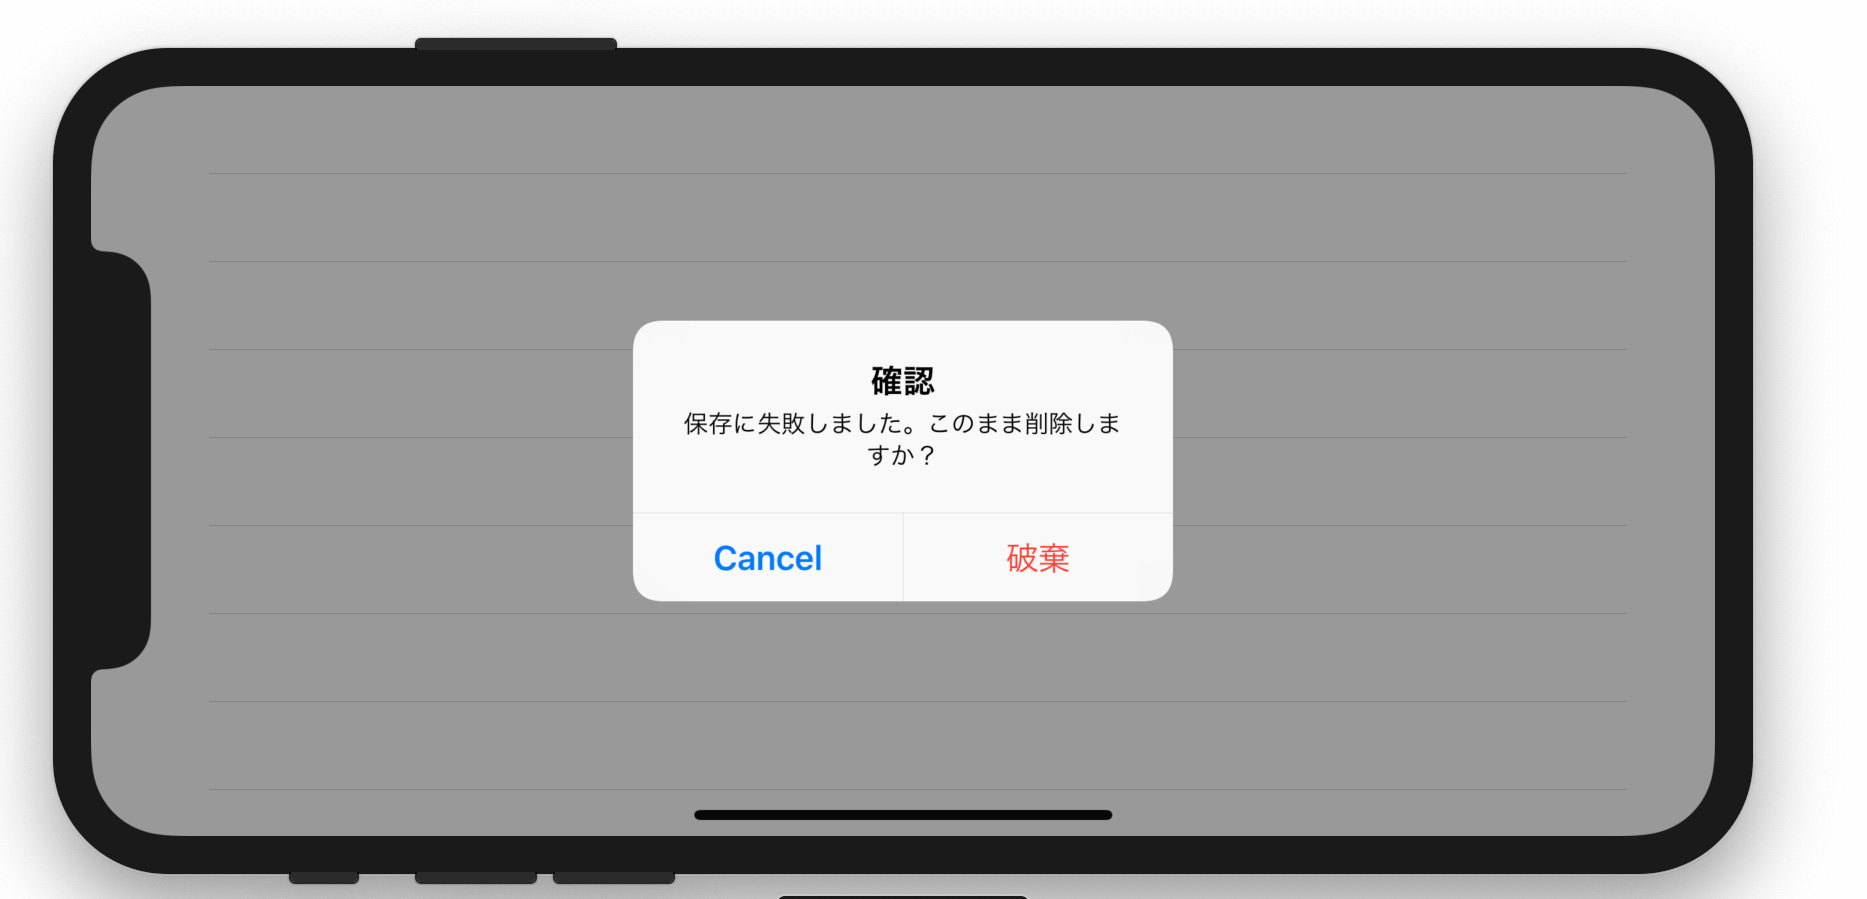
let alert = UIAlertController(title: "確認",
                              message: "保存に失敗しました。このまま削除しますか?",
                              preferredStyle: UIAlertController.Style.alert)
alert.addAction(UIAlertAction(title: "Cancel", style: .cancel, handler: nil))
alert.addAction(UIAlertAction(title: "破棄", style: .destructive, handler: nil))
present(alert, animated: true, completion: nil)
ボタンにアクションを繋げる
上記コードのままではどちらを選んでもアラートが閉じるだけなので、例えば破棄を選んだら何かアクションをした場合は handlerを実装します。
alert.addAction(UIAlertAction(title: "破棄", style: .destructive, handler: { (alertAction) in
    print("Any action!!")
}))
3ボタン: Yes or No or Other の三択
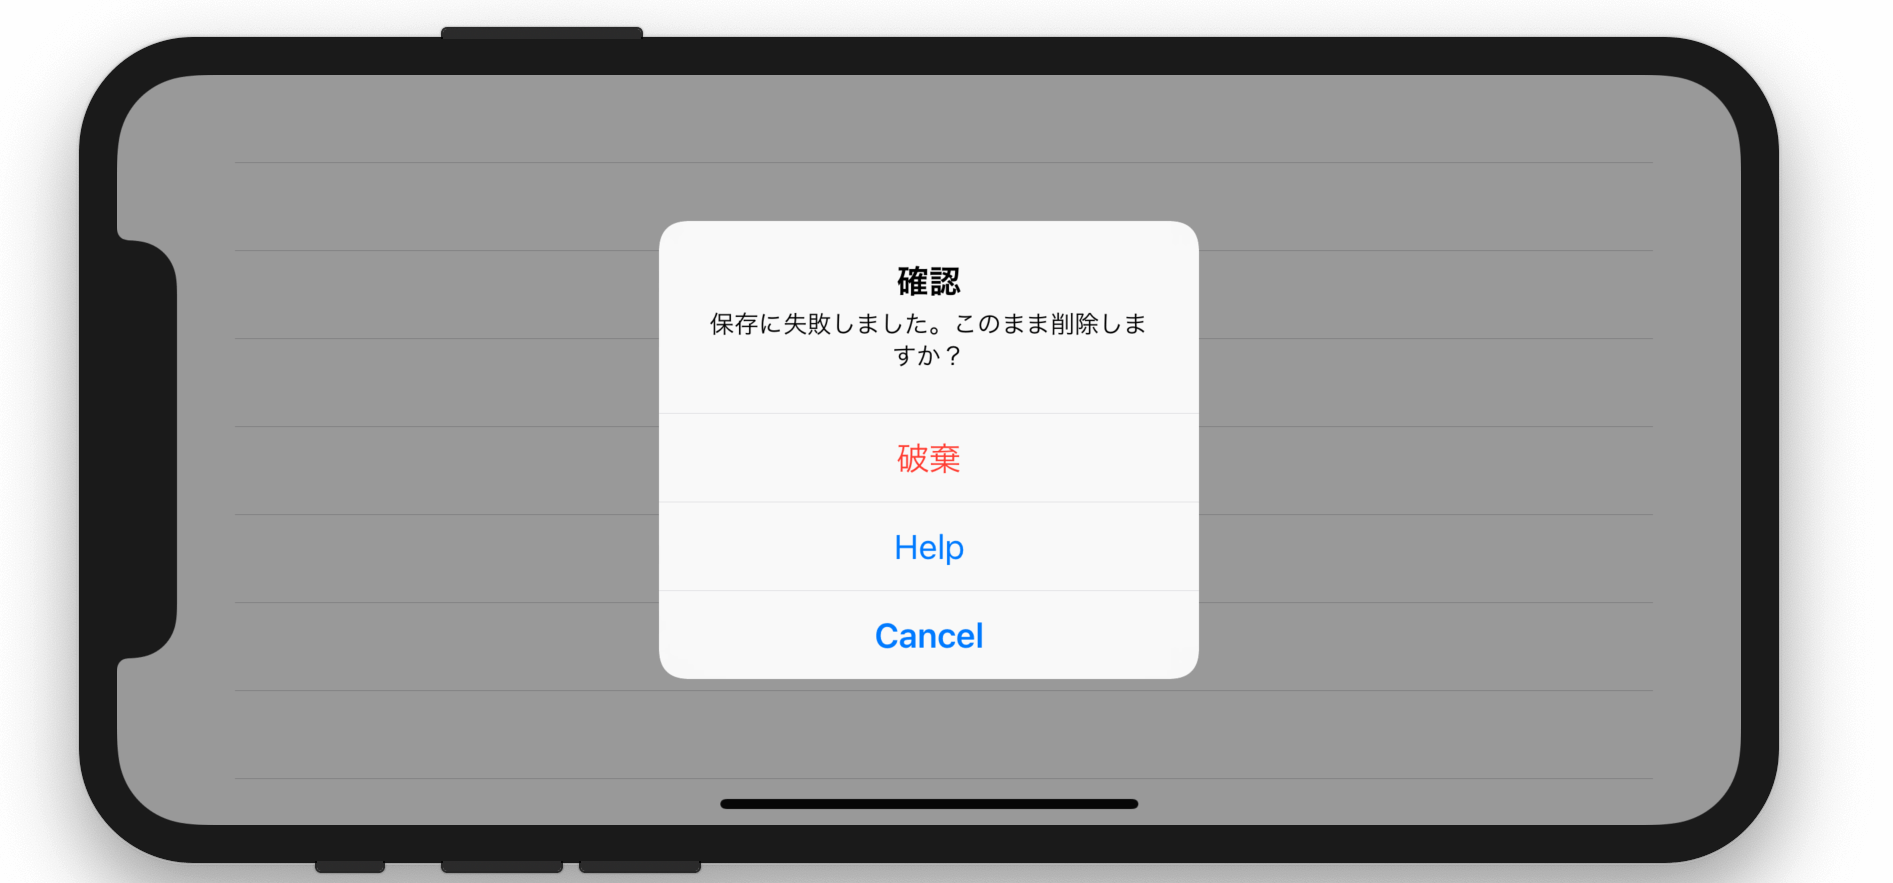
3択になるとボタンが縦に変わります。
UX観点でいうとボタンは3つ以上はつけるべきではなく、4つは絶対にやめるべきです。
let alert = UIAlertController(title: "確認",
                              message: "保存に失敗しました。このまま削除しますか?",
                              preferredStyle: UIAlertController.Style.alert)
alert.addAction(UIAlertAction(title: "Cancel", style: .cancel, handler: nil))
alert.addAction(UIAlertAction(title: "破棄", style: .destructive, handler: nil))
alert.addAction(UIAlertAction(title: "Help", style: .default, handler: nil))
present(alert, animated: true, completion: nil)
UIAlertAction.styleでボタン色を変更できる
UIAlertAction作成時に渡すstyleには3種類あります。
- .cancel
.destructive- .default
これらはiOS側が定めたガイドラインに沿った装飾が施されます。
destructiveとは副作用のある行動で使います。
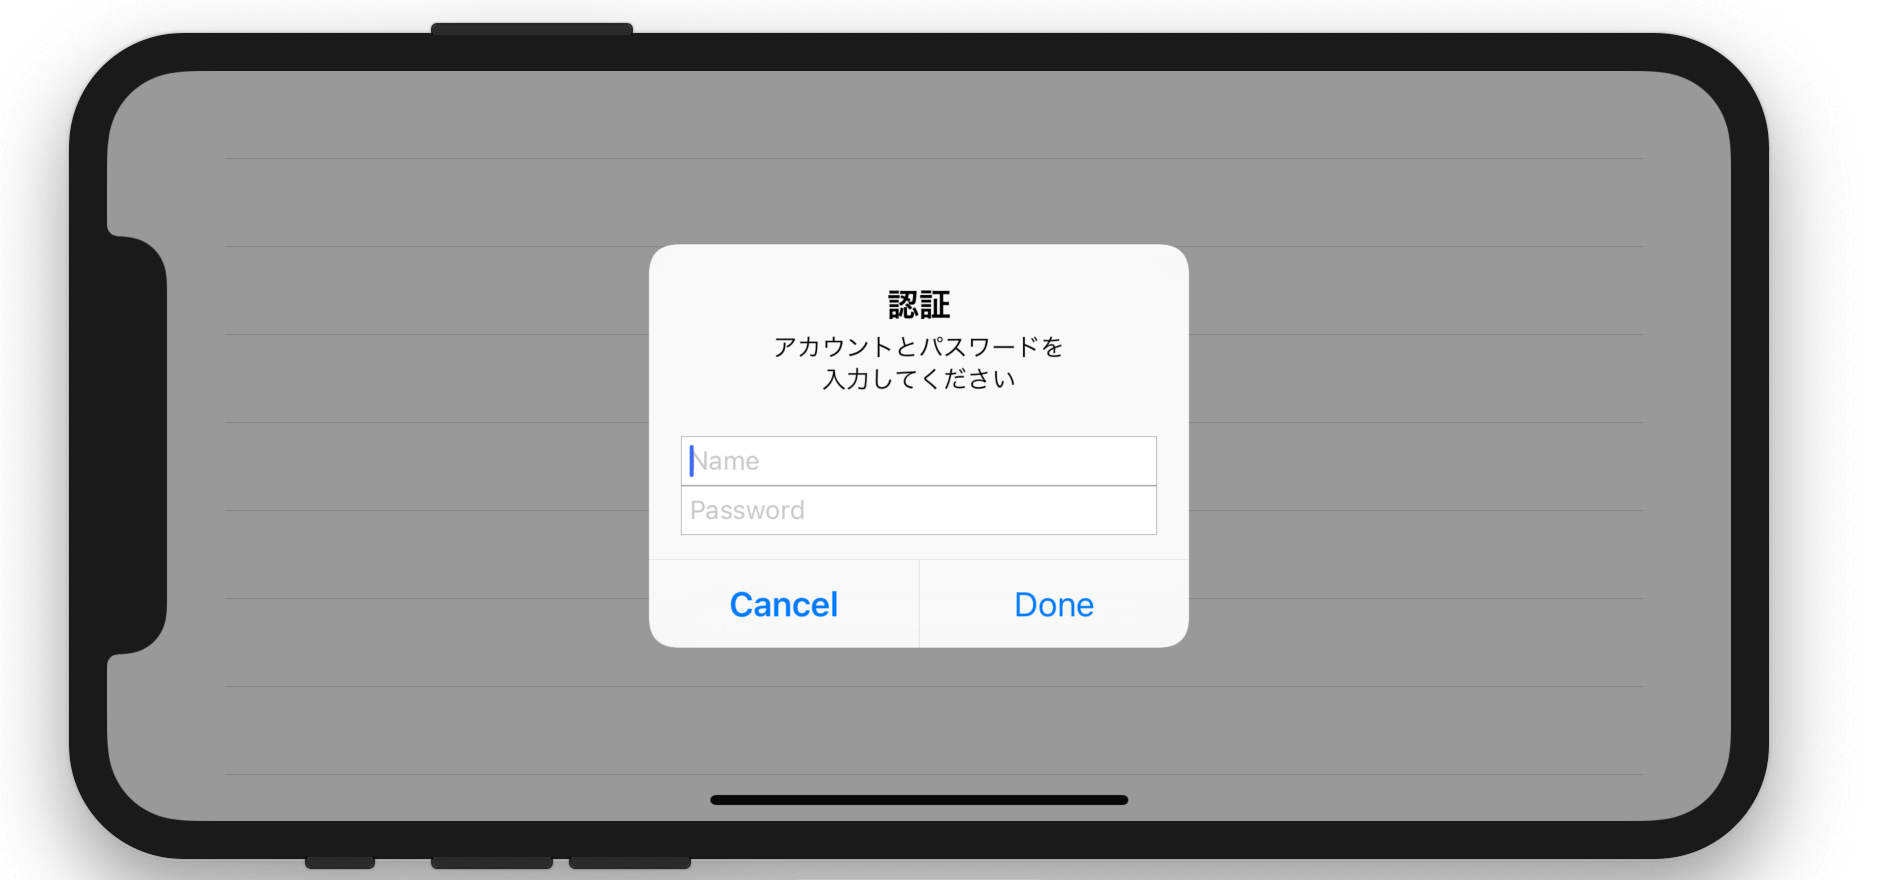
テキストフィールドをつける
let alert = UIAlertController(title: "認証",
                                      message: "アカウントとパスワードを\n入力してください",
                                      preferredStyle: UIAlertController.Style.alert)
alert.addAction(UIAlertAction(title: "Cancel", style: .cancel, handler: nil))
alert.addTextField { (tf) in
    tf.placeholder = "Name"
}
alert.addTextField { (tf) in
    tf.placeholder = "Password"
}
alert.addAction(UIAlertAction(title: "DONE", style: .default, handler: { [weak alert] (ac) in
    let name = alert?.textFields?.first?.text ?? ""
    let password = alert?.textFields?.last?.text ?? ""

    if name == "hoge" && password == "fuga" {
        print("成功")
    }
}))
present(alert, animated: true, completion: nil)
テキストフィールドもつけることが出来ます。
alert?.textFieldsでUITextFieldへのアクセスは追加順ですが、確実にする場合であれば、
addTextField内のUITextFieldに対してtagを使って数値管理することで先程よりはマシになります。
まとめ
アラートは準正常といったエラーハンドリングで使われやすいので、ささっと使い方を覚えて、面白くない作業で躓かないようにしたほうがいいです。 またアラートはユーザー側としては突発的に操作権限を剥奪され操作を強要するため、UXとしてあまり良いものとは言えません。 そのため王道フローの通常利用においてアラート前提のフローはさけるべきです。